

TL;DR — Stick on nail polish strips are pliable sheets of real, cured nail polish that press onto your nail and bond when you smooth them down with pressure and body heat. There's no wet lacquer and no drying time. Most people get lifted edges because they skip the oil-free prep step. This guide walks you through the full process in under 20 minutes.
What You'll Need
Applying stick on nail polish takes 15-20 minutes and needs almost nothing beyond the strips themselves. Gather these before you start so you're not scrambling mid-manicure with polish half-applied.
- A set of stick on nail polish strips (nail wraps or gel strips)
- Clean, dry, oil-free nails
- A nail file or emery board
- A cuticle pusher or orange stick
- Scissors (optional, for trimming wider strips before applying)
- A clear top coat (optional, for extra durability on air-dry strips)
- A UV or LED lamp only if you're using gel-type strips that require curing
Most air-dry strips, like the standard nail wraps sold at Nailwraps.ca for $4.99 CAD per set, need no lamp at all. Check your packaging to confirm which type you have before you begin.
How Stick On Nail Polish Strips Actually Work
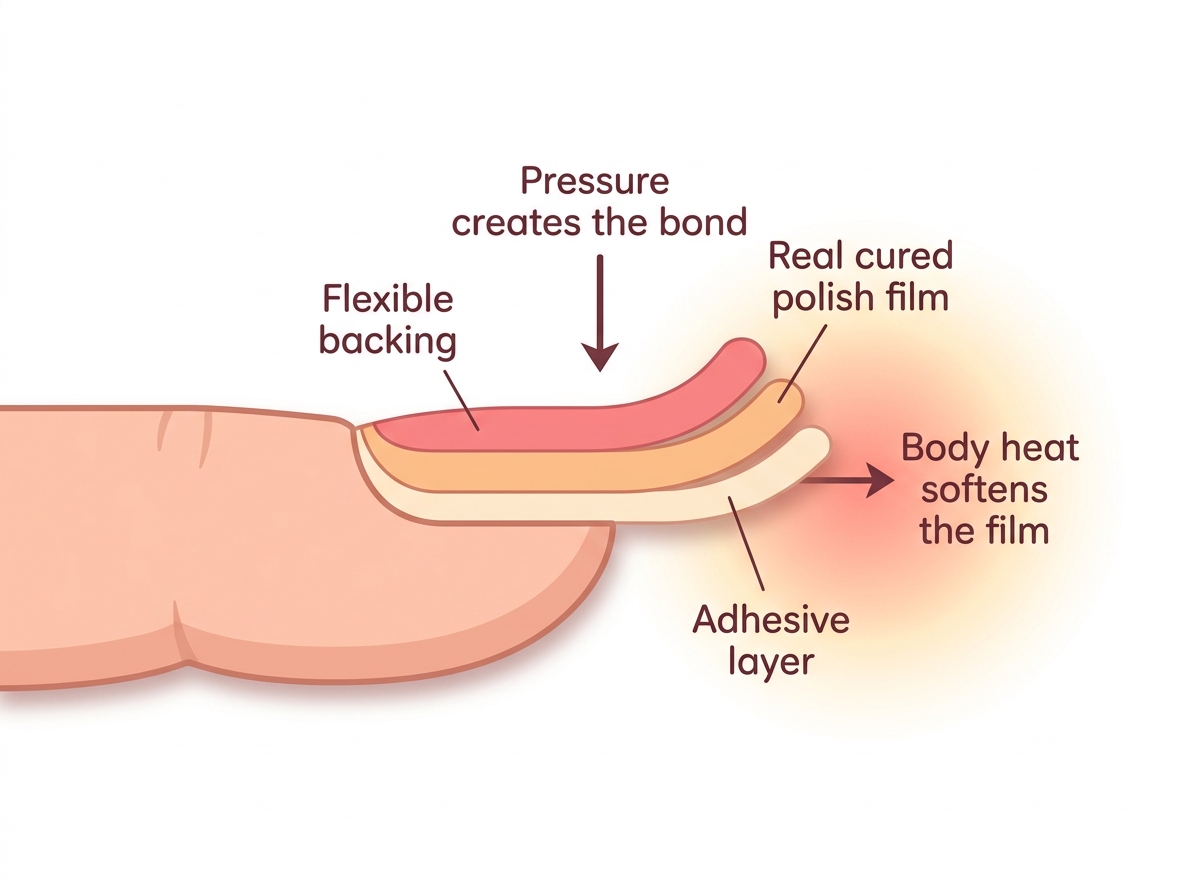
Stick on nail polish strips are thin, flexible sheets of real cured nail polish backed with an adhesive layer, not printed plastic stickers. When you press a strip onto your nail, the adhesive grips the keratin surface and the warmth from your fingers softens the polish film so it molds tightly to the nail's curve. That combination of pressure plus heat creates a bond that behaves like a painted-on manicure but skips the wet lacquer and the wait.
Because the polish is already cured or semi-cured, there's nothing to smudge and no drying window. Nailwraps.ca makes its strips with 100% real nail polish ingredients, which is why the finish looks and wears like a salon manicure rather than a cheap decal. Gel-type versions are semi-cured, meaning they stay pliable until you finish the bond under a UV or LED lamp.
Step 1: Prep and clean your nails
This step removes the oils and moisture that stop the adhesive from gripping. Skipping it is the number one reason strips lift within a day.
- Wash your hands and dry them fully. Water left on the nail plate weakens the bond.
- Push back your cuticles gently with a cuticle pusher or orange stick so the strip can sit right at the base.
- Lightly buff the surface of each nail with the rough side of your file. You want a matte, slightly textured finish, not a shine.
- Wipe each nail with rubbing alcohol or the prep pad included in your kit to strip away natural oils.
Don't apply hand cream or cuticle oil before this step. If your nails feel slick after wiping, wipe again. If the strip still won't stick after prep, do a second alcohol wipe and let the nail air-dry for 30 seconds before applying. A clean, dry, oil-free nail is the whole foundation of a manicure that lasts.
Step 2: Choose the strip that matches each nail size
Matching strip width to each nail is what makes the polish lie flat with no gaps at the sides or overhang at the edges. Every set includes a range of widths for exactly this reason.
Hold a strip against the nail without peeling the backing yet. The strip should cover the nail from side to side without folding over onto the skin. Pick the strip that's slightly narrower than your nail if you're between sizes, since an overhanging strip lifts faster. Nailwraps.ca strips are designed to fit all nail sizes, so lay out the full set and match each one to a nail before you start peeling.
If a strip is a touch too wide, trim the sides with small scissors rather than forcing it. If no strip is narrow enough for your pinky, trim a larger strip down instead of stretching a wide one flat.
Step 3: Peel and position the strip on your nail
This step places the strip precisely at the cuticle line so the manicure looks grown from the base, not stuck on top. Alignment here decides how professional the result looks.
- Peel the strip off its backing slowly, holding it by the tab or edge. Avoid touching the sticky underside with your fingers.
- Line up the curved end of the strip about a millimeter below your cuticle. Leaving a tiny gap stops the polish from touching skin and lifting.
- Lower the strip onto the center of the nail first, then let the sides settle down.
Don't stretch the strip to reach the tip. Pulling distorts the shape and creates tension that peels the edges within hours. If you misalign the strip, peel it back up gently within a few seconds and reposition it before pressing down hard. Position first, bond second. Once you press firmly in the next step, repositioning gets much harder.
Step 4: Press and smooth to activate the bond
Pressing is what locks the real-polish film onto the nail. The warmth from your fingertips softens the adhesive and the polish so it conforms to every curve.
- Press the strip down firmly from the cuticle outward toward the tip, working out any trapped air.
- Use the flat pad of your thumb or finger to smooth the surface for 10-15 seconds per nail. The heat matters, so real skin contact beats a tool here.
- Press the edges down along the sides of the nail so nothing catches.
Work the strip from the center outward every time. Pushing air toward a closed edge traps bubbles. If you see a bubble forming, lift the nearest free edge slightly, smooth the air out toward it, then press flat again. For gel strips, this is also when the semi-cured film shapes to your nail before curing. A firm, warm press for a full 15 seconds is worth more than a quick tap. Rushing this step is why manicures fail early.
Step 5: File off the excess at the tip
Filing removes the strip that hangs past your nail edge, giving a clean, finished tip. The technique matters as much as the tool.
- Fold the excess strip down over the free edge of the nail.
- Hold your file at a 45-degree angle, pointing downward toward the floor.
- File in one direction only, using firm downward strokes, until the excess breaks away cleanly.
Always file downward, never back and forth across the tip. Sawing motions lift the strip and fray the edge. If the strip tears jaggedly instead of filing clean, your nail may still be warm and soft from pressing; wait 20 seconds and try again with slow strokes. For gel strips, do a light initial file before curing, then a final shaping file after the lamp. The strip should now end flush with your natural nail edge with no rough overhang.
Step 6: Seal or cure for longer wear
This step is where air-dry and gel strips differ. Air-dry strips are ready to wear the moment you finish filing, while gel strips need a lamp to fully harden.
For air-dry strips, no UV light is needed. They're wearable immediately. If you want extra durability, brush on a thin layer of clear top coat over each nail and along the free edge, then let it dry a few minutes. This is the stick on nail polish with no UV light route most people prefer for speed.
For gel stick on nail polish, cure each hand under a UV or LED lamp for 60-120 seconds following your kit instructions. A small mini UV lamp for gel nails works fine. Curing hardens the semi-cured film into a glossy, chip-resistant finish that rivals a gel manicure. If gel strips still feel tacky after curing, cure again for another 60 seconds; under-curing leaves a sticky, peel-prone surface. Wondering which lasts longer? See the breakdown in nail wraps vs gel polish.
Air-Dry vs Gel Strips: Which Should You Pick?
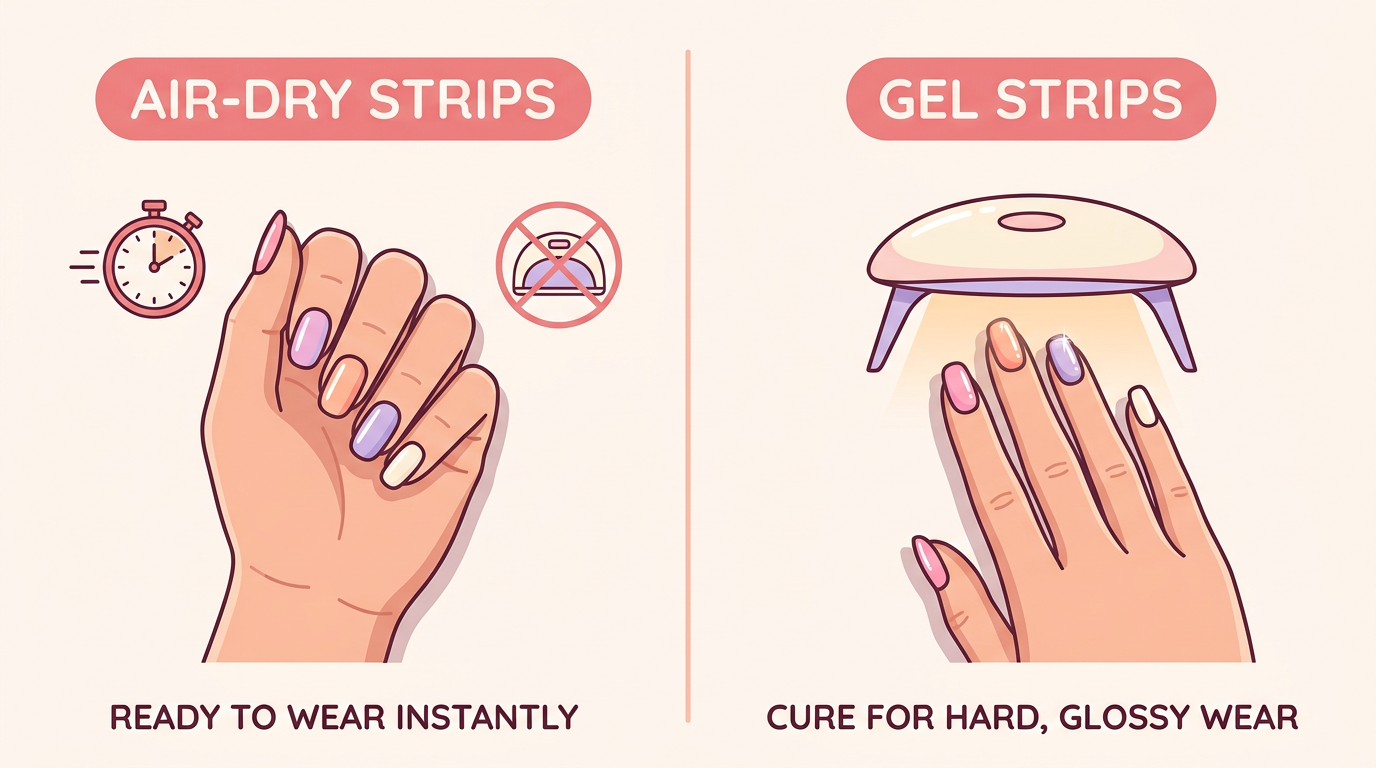
Air-dry strips win on speed and gel strips win on longevity. Use this table to decide which type fits your routine before you buy.
| Factor | Air-Dry Strips | Gel Strips |
|---|---|---|
| UV/LED lamp needed | No | Yes |
| Application time | 10-15 min | 15-20 min |
| Typical wear | Up to 10 days | Up to 10+ days |
| Finish | Salon polish look | High-gloss gel |
| Best for | Quick, travel, no equipment | Maximum durability |
| Extra cost | None | Lamp (one-time) |
If you travel often or want a manicure in minutes with zero equipment, air-dry strips are the easier choice. If you already own a lamp and want the hardest, glossiest wear, gel strips are worth the extra two minutes. Both use real polish, so the color quality is the same either way.
Troubleshooting Common Problems
Most stick on nail polish problems trace back to prep, sizing, or pressing, and each has a quick fix.
Strips lifting or peeling at the edges within a day or two. This almost always means oil or moisture was left on the nail. Redo the alcohol wipe next time and seal the free edge with top coat. For an immediate fix, lift the loose edge, dab a tiny bit of nail glue or top coat underneath, and press it flat.
Air bubbles trapped under the strip. Bubbles come from pressing air toward a closed edge. Lift the nearest free edge, smooth the trapped air out toward it, then press flat. On a fresh application, always work from the center of the nail outward.
Strips too wide or too narrow. Trim wider strips with small scissors before applying rather than folding them over the skin, which lifts fast. For narrow nails, trim a larger strip down instead of stretching a small one, since stretching distorts the shape.
Manicure not lasting the full 10 days. Wear gloves for dishes and cleaning, since hot water and detergent break down any adhesive. A top coat every few days refreshes the seal. Rough prep, oily nails, or under-pressing are the usual culprits behind early wear.
Removing strips without damaging the natural nail. Never peel a strip off dry, since that pulls up layers of your nail plate. Soak your fingertips in warm soapy water for a few minutes to loosen the adhesive, then gently roll the strip off from the base. For gel strips, a short acetone soak like traditional gel removal works. Follow with cuticle oil to rehydrate.
You're Done
You should now see a smooth, even layer of real nail polish bonded flat to each nail, ending cleanly at the tip with no lifting or bubbles. Tap a nail lightly; it should feel solid and dry with no tackiness (unless a gel strip still needs curing). If the edges are flush and the color sits right at your cuticle line, you've applied stick on nail polish correctly and it should last up to 10 days with normal care.
Key Takeaways
- Stick on nail polish strips are real cured polish that bonds to the nail with pressure and body heat.
- Oil-free, buffed, dry nails are the single biggest factor in a manicure that lasts.
- Air-dry strips need no UV light and are wearable immediately after filing.
- Gel-type strips are semi-cured and require 60-120 seconds under a UV or LED lamp.
- Properly applied strips last up to 10 days; soak in warm water to remove without nail damage.
Frequently Asked Questions
Are stick on nail polish strips made from real nail polish?
Yes. Quality stick on nail polish strips are thin sheets of real cured nail polish with an adhesive backing, not printed plastic stickers. Nailwraps.ca makes its strips with 100% real nail polish ingredients, so the color, shine, and wear match a painted salon manicure rather than a decal finish.
Do stick on nail polish strips need UV light to work?
Air-dry strips need no UV light and are wearable the moment you finish filing. Only gel-type strips require curing, which takes 60-120 seconds under a UV or LED lamp to fully harden the semi-cured film. Check your packaging to confirm which type you have before applying.
How long does stick on nail polish last?
Stick on nail polish typically lasts up to 10 days with proper prep and care. Wear depends on oil-free application, firm pressing, and sealing the free edge with top coat. Wearing gloves for dishes and cleaning extends wear, since hot water and detergent break down the adhesive over time.
How do you remove stick on nail polish without damaging your nails?
Never peel strips off dry, as that pulls up layers of your natural nail. Soak your fingertips in warm soapy water for a few minutes to loosen the adhesive, then gently roll each strip off from the base. For gel strips, use a short acetone soak, then apply cuticle oil to rehydrate.
Are stick on nail polish strips available in Canada?
Yes. Nailwraps.ca is a Canadian store selling nail wraps and gel nail stickers made with real polish, priced at $4.99 CAD per set, shipping locally from a Canada warehouse. They carry designs from florals to French tips plus UV lamps for gel strips, with a lowest-price guarantee.